I’m going to hazard a guess that if you are reading this, you are probably either about to begin or are half way through an organizing project! I may be wrong and you are just looking at all the fabulous choices that The Container Store or Target are now offering, if so, this article does not apply to you!!!
As a Professional Organizer for 12 years, let me share a few tips with you (and believe me, I have purchased thousands of organizing containers, and have learned A LOT along the way!).
Tip #1: Do NOT run out and buy a bunch of miscellaneous containers for a project that you have not yet started….
Why? Until you have truly ORGANIZED your space, you won’t actually know what needs to be containerized. We have all had the urge to buy a bunch of Pinterest pretty containers, but the reality is, until you have worked through the entire space, eliminating items you don’t use, need or want, you may have much less than you initially thought you would.
Tip #2: Now that you know EXACTLY what needs to be containerized (and where), take measurements.
I can’t tell you how many times the wrong sized container has been purchased because you forgot to measure the drawer or cupboard it was intended for.
Tip #3: Don’t limit yourself to one store for containers.
Sometimes, you will need to shop around to get EXACTLY what you are looking for. I LOVE The Container Store, but they are not always on your doorstep and if you are like most, you want it NOW (not in 3 days). Target, Home Goods, Bed Bath & Beyond, AtHome, Walmart, Lowes, The Home Depot all carry a good selection of items, but you may need to visit a couple or more to get everything you need. If you are an online shopper and can wait a few days, The Container Store, Target and Amazon offer great selections.
Tip #4: Don’t be afraid to use different types of containers for different projects/areas of your home.
Do hyacinth water baskets look gorgeous on display on your closet shelf? Absolutely, however, they don’t function well in your pantry where you ideally want to see what is in each container. The clear acrylic containers do the best job here so you can group items by type and everyone (kids too) can see what’s in them.
Tip #5: If you can’t find drawer organizers that are one piece, don’t be afraid to use the multi shaped organizers instead.
For example, in the bathroom drawers, you typically need a longer container for your toothbrush and toothpaste, but a smaller square container for your Q-tips or bobby pins. As much as I love the neat fit of one drawer organizer, it often doesn’t match your needs. Again, don’t be embarrassed to go into the store with a tape measure and accurate drawer measurements. You will thank me later!
Tip #6: Don’t skimp on containers!
I always recommend buying a few extra for the “just-in-case” drawers or cupboards you have probably forgotten… If your laundry room has a drawer, I think a junk type drawer for batteries, basic tools, scissors, a place for coins is a necessity as well as extras for corralling medicine/first aid etc etc…
Tip #7: Match your container to the items you are organizing
If you want a container for Manuals & Warranties, make sure it is big enough to hold 8×11 paperwork without cramming everything in or folding it in half. If you want to organize kitchen utensils, make sure the container is not so deep that you can’t see what’s at the bottom. If you are looking to organize your garage, make sure your containers are big enough to store oversize items for holidays etc.
Tip #8: If you don’t have a huge budget for containers, see if you can repurpose with something you already have in your home.
Tupperware drawers or cupboards are the first place I go to search for containers if my clients have low or no budget for purchasing containers. You can also use shoe or jewelry boxes and their lids for versatile organizing. I will often use mismatched or extra drinking glasses for standing up items like make up brushes or drinking straws which take up a much smaller footprint. I even use small tea-light glass containers (super inexpensive from Michaels or Joanns for things like Q-Tips or Dental Flossing sticks.
Tip #9: LABEL, LABEL, LABEL
It doesn’t matter if you don’t have a fancy label maker, custom labels or basket clips (although a uniform labeling system always looks the best), but once you have organized & categorized your items, do yourself a favor and LABEL it!
At a pinch, you can print off either pre-printed labels (AVERY are the BEST) or even cut out your own printed labels from Word or similar. Pinterest have hundreds of sites that offer pre-printed labels if you are feeling artsy. If the worst comes to the worst, use some painters tape and a sharpie to ensure everyone in your household can see exactly what they are looking for!
Don’t Forget these areas or items that could use some organizing:
- Arts & Crafts: Depending on your household you can separate into Paints/Crayons/Coloring Pencils or Pens/Stickers/Paper (white or colored) or Glues etc
- Office Supplies: Pens/Paper/Staples/Paper Clips/Whiteout/Rubber bands/Labels/File Folders/Printer Paper/Printer Ink
- Bathroom: Nail Polish/Feminine Supplies/Shaving Supplies/Dental overflow (think spare toothbrushes and floss if you buy in bulk)/Travel miniatures, Medicine by type (Cold, Allergy, Indigestion, First Aid)
- Closet: Belts, Small wallets/purses, footwear insert, exercise equipment
- Cords & Cables: Every household I have EVER been in has a ton of cords and cables. Consider containerizing yours by type; Mobile phone and car chargers, Audio Visual Cables (HDMI, Animal Cables) and Computer/Printer related cables.
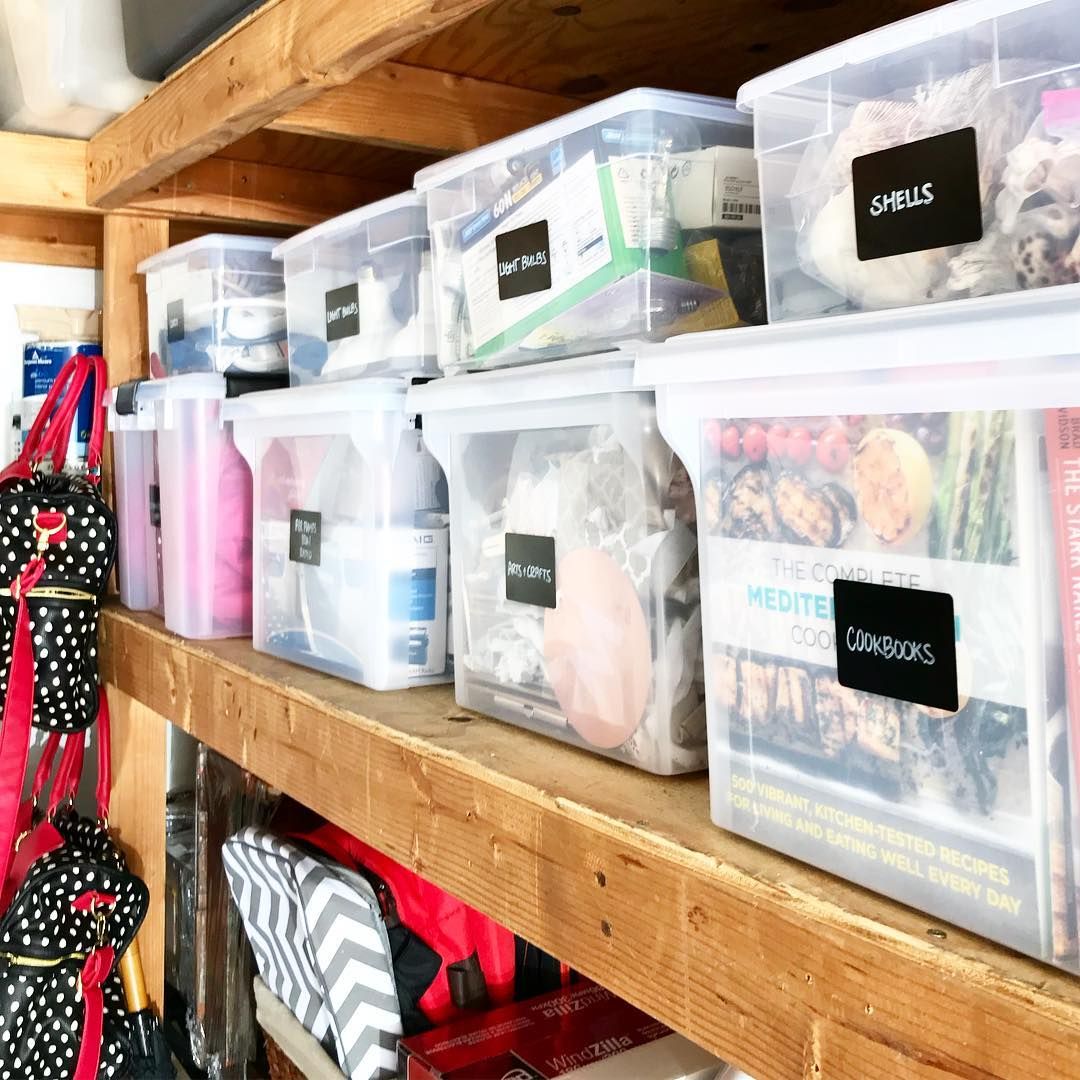
- Miscellaneous: Batteries, Light bulbs, Shoe Cleaning
- Keepsake/Memorabilia Items: Children’s schoolwork/Photos/travel mementos/Invites/Birthday, Anniversary or Special Cards and Letters
- Garage: Holiday Décor, Keepsakes/Memorabila, Overflow from kitchen (Costco or bulk items can be stored in large clear containers grouped by type)